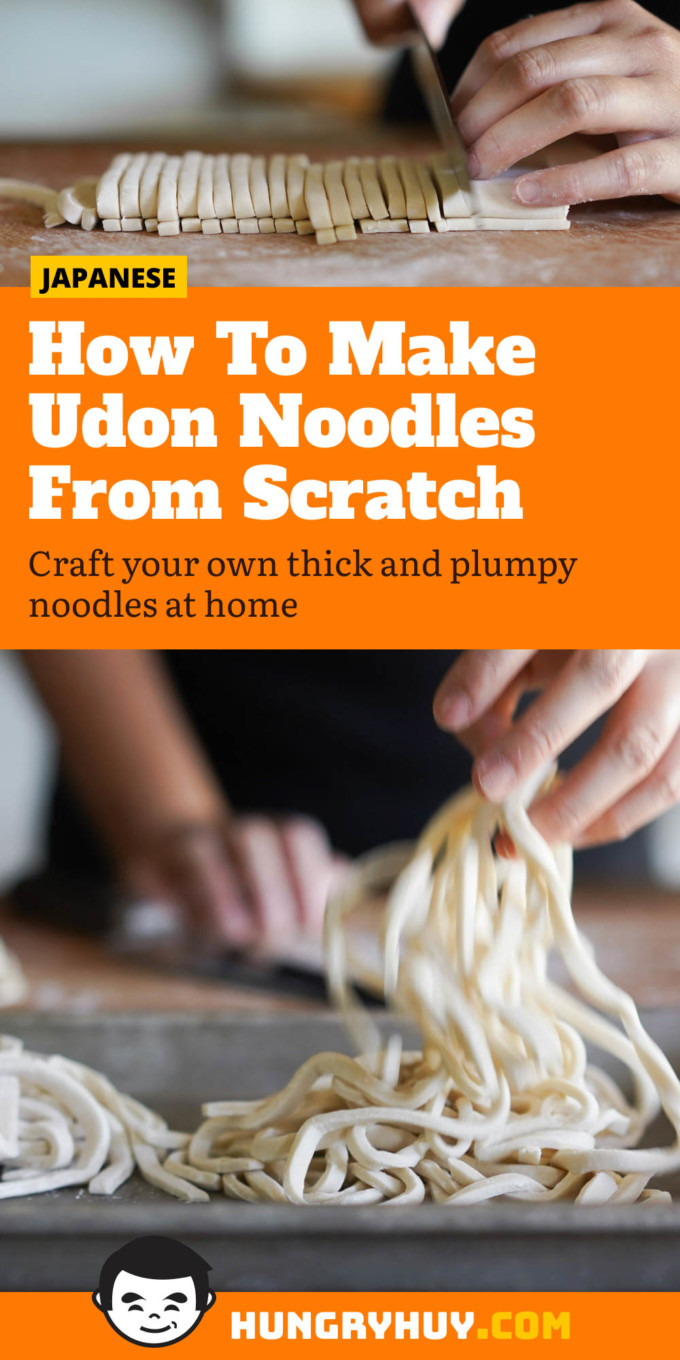
Thick and plump with a slightly chewy consistency is the only way I can describe these udon noodles from scratch. Making homemade udon noodles is actually a lot easier than it sounds, especially if you have made homemade pasta before. It’s also a lot of fun because it includes a good foot-stomping workout!
What is udon?
These thick udon noodles from scratch are made of all-purpose wheat flour, hot water, salt, and tapioca starch. As a kid, I ate lots of store-bought refrigerated udon packs with my parents and we added our own toppings to them. Udon is so versatile because you can eat it in many different ways: in a soup, with a dipping sauce, as a hot dish, or even cold.
Some popular udon dishes are tempura udon (udon in a simple broth with vegetable and/or shrimp tempura), nikutama udon (udon in a sweet broth with beef and a soft boiled egg), and yaki udon (a soy sauce-based, stir-fried udon with vegetables and meat).
Lucky for us, there are many different Japanese restaurants in Southern California that feature fresh udon noodles, like Marugame Udon or Meiji Seiman. Japanese grocery stores like Mitsuwa also sell frozen and fresh udon noodles that you can make at home and combine with other toppings you prefer.
Not to be restricted to only having udon when I go to a restaurant or remembering to buy fresh or frozen packs in the grocery store, I learned how to make fresh udon noodles at home. What’s great about this recipe is that you can easily make multiple servings and freeze the noodles for future recipes.
How to make udon (step by step)
What’s interesting about this recipe is that it brings to mind my homemade wonton wrappers from my pork and shrimp shumai and xiao long bao recipes where I made a plain dough using all-purpose flour, hot water, and salt. The hot water used in this recipe helps denature the proteins in the flour and give it its soft and chewy texture. Traditionally, hot water isn’t used in the dough, but I find that it helps a lot by making the dough softer and easier to work with.
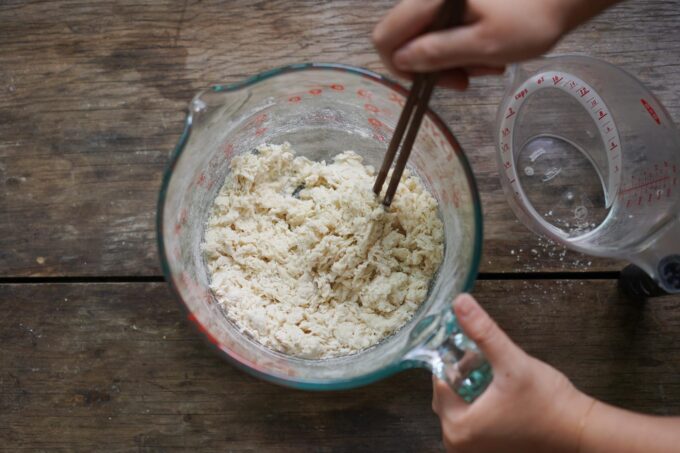
1. To make fresh udon noodles, boil water in a kettle and measure out the water in a cup. Add the salt and stir until it dissolves. Add flour and tapioca starch to a large mixing bowl and carefully add in the hot water and salt liquid. Mix this until it’s a shaggy dough–I like to use chopsticks.
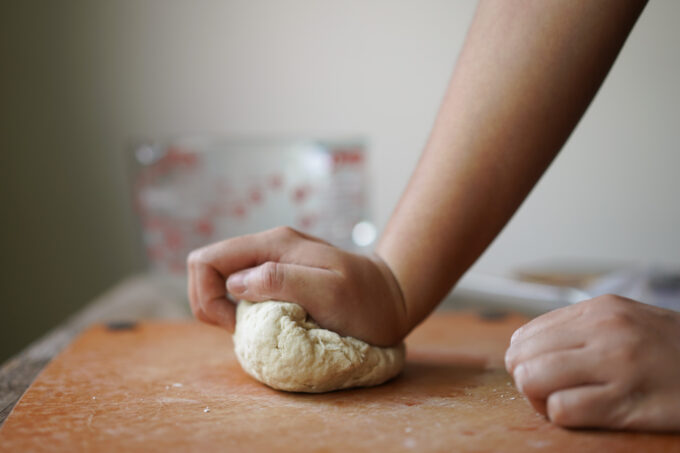
2. At this point, you can use your hands to form a ball of dough in the bowl and then transfer the ball into a clean surface. Knead the dough for about five minutes or until the dough has a smooth texture. Place the dough in a large ziplock bag (two servings work for a one-gallon freezer bag, but if you double the recipe you need a five-gallon bag) and remove all the air. Let the dough rest for 30 minutes on the counter.
3. Traditionally, homemade udon noodles involve an uncommon step in making noodles: foot-stomping. Since the udon dough has a tendency to be tougher to knead and roll out, it’s easier to roll out the dough using pressure from walking on the dough.
Don’t worry, you won’t be stepping on the dough directly with your feet, and this is where the plastic bag comes into play. Cover the plastic bag with a towel in case it rips and start stepping on the dough, ‘kneading’ it with your feet!
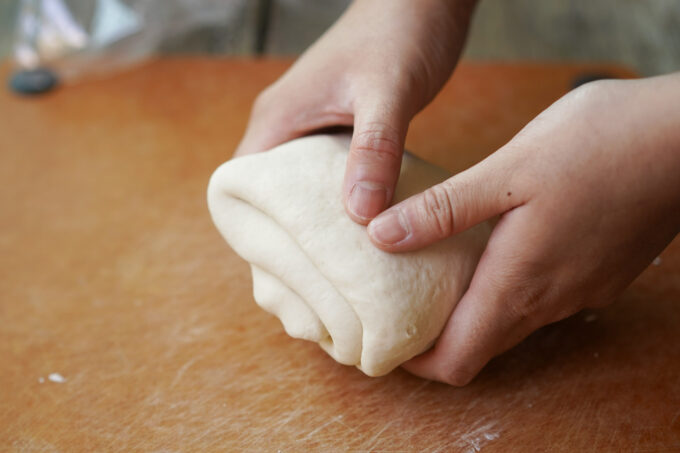
Carefully step over the dough and flatten it out to spread the dough throughout the bag. I do about 30 steps before I open the bag and form it into the shape of a ball and repeat two more times (the total would be about 90 steps).
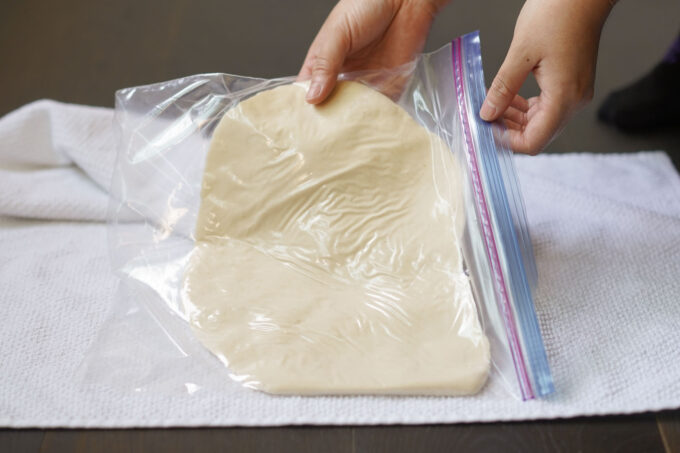
4. You can test the doneness of the dough by slightly pinching it with your pointer finger and thumb. When the dough has a similar softness to an earlobe, then it’s finished. Shape it into a ball once more and let it rest in the bag for at least two hours at room temperature.

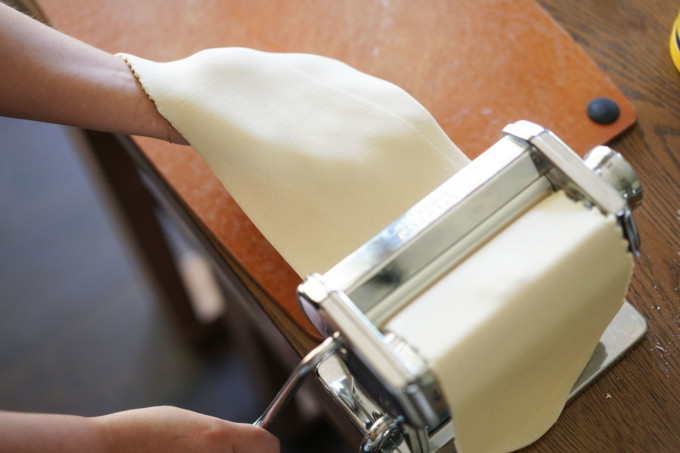
5. Once the dough is rested, you can use a rolling pin or a pasta machine to roll out the dough until it’s about 3 ½-4 millimeters (on my pasta machine it is setting 2). You can use extra cornstarch or tapioca starch if your dough is sticking to your rolling pin or pasta machine.
6. Sprinkle some cornstarch on the dough and carefully fold ¼ of the left side of the dough towards the right side of the dough. Continue to fold until you end up with a small rectangle.

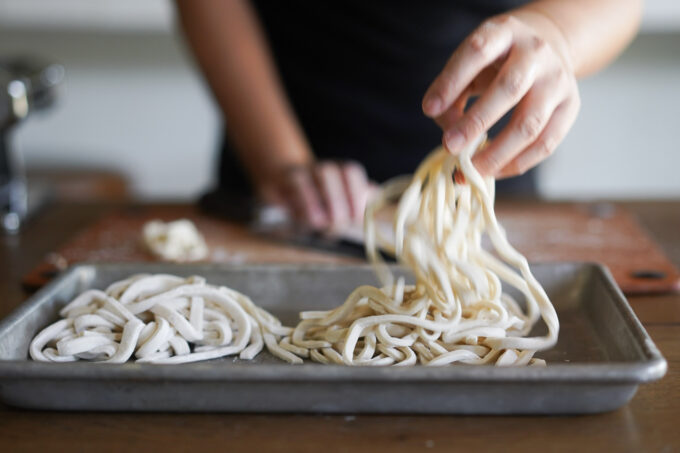
7. Use a very sharp knife to make vertical slices of noodles with about three millimeters in thickness. Keep in mind the noodles will expand a bit when cooking, so cut the noodles smaller than you’d like the final size to be.
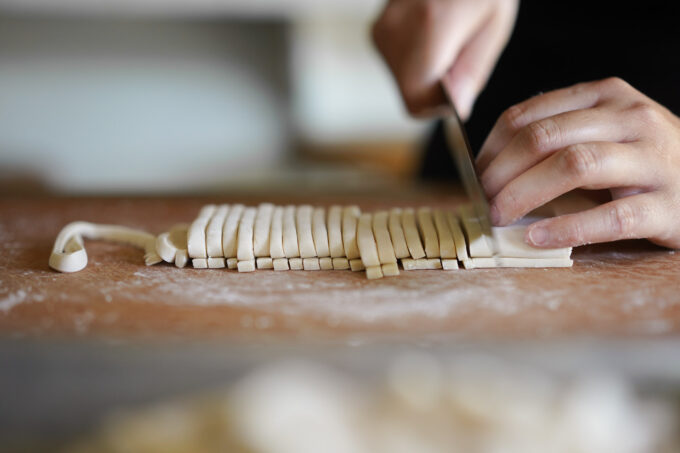
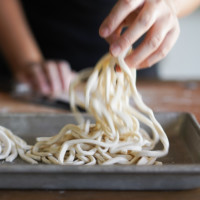
8. After you’ve cut all your fresh udon noodles, use your fingers to unfold all the noodles and sprinkle extra cornstarch to prevent sticking. You can either make them into small nests to freeze in plastic bags for future use. Frozen udon noodles should last at least a month in your freezer.
How to cook the udon
1. Fill a large pot with eight to ten cups of water and bring it to a boil. Add the salt into the pot and stir to dissolve. When the water is boiling, add about one serving of udon noodles to the water and swirl to prevent sticking.
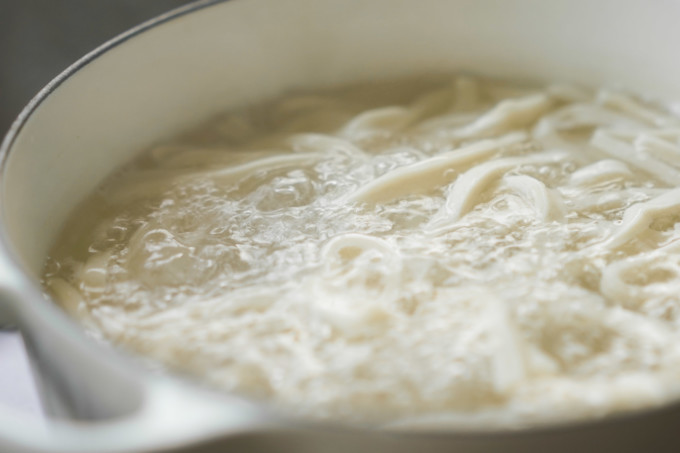
Cooking the fresh noodles takes about 12 to 15 minutes depending on their thickness and 20 to 25 minutes if they are frozen. Test your noodles by taking a sample noodle. It should be cooked throughout the noodle with a soft, but chewy texture.
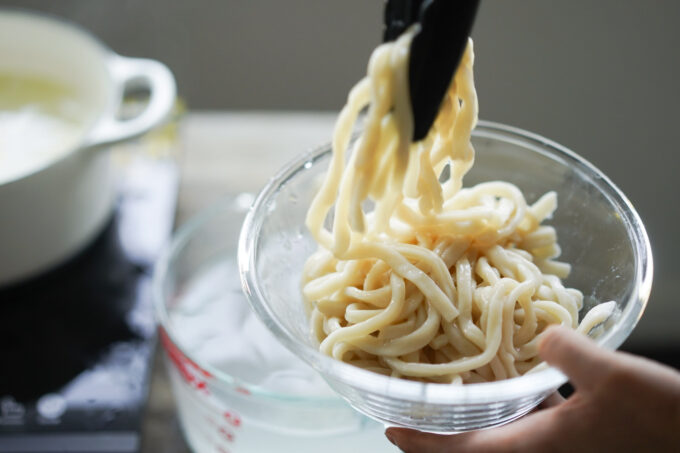
2. Once the noodles are finished, transfer the noodles to an ice water bath to stop the noodles from cooking. You only need to keep them in this bath for about a minute before removing them. Then they’re ready to use in a recipe, like yaki udon.
What is udon made of?
Udon noodles have a wheat flour base and typically mixed with water and salt for flavor. I like to add tapioca starch to add extra chewy texture in my noodles.
Does udon have egg?
Udon noodles do not have egg in the dough, although it is wheat-based. This is a nice vegan option for people who have dietary restrictions.
What can I add to udon noodles?
Udon noodles are very versatile in that you can add them to different types of soups from basic soups of soy sauce, dashi, and mirin, to curry based soups. You can also make yaki udon, which is a stir fry dish that you can add multiple types of vegetables and your choice of meat.
What is the difference between ramen and udon?
While both ramen and udon noodles are wheat-based noodles, ramen also has alkaline salt called kansui that gives the noodles a glossy texture and different flavor. Udon noodles, on the other hand, have a basic base of all-purpose flour, salt, water, and tapioca starch.
Homemade Udon Noodles
Ingredients
- 111 g or ½ c boiling water
- 10 g or 2 tsp salt
- 190 g or 1 ⅓ c all purpose flour
- 30 g or ¼ c tapioca starch
- cornstarch for sprinkling
Cooking udon
- 8 c water for boiling
- 10 g or 2 tsp salt
- ice
- water for ice bath
Equipment Used
Instructions
Making udon noodles
- Boil water in a kettle or over the stove top and measure out your salt. Combine both in a measuring cup and stir until it dissolves.
- In a separate large mixing bowl, sift the all purpose flour and tapioca starch over the bowl.
- Carefully add the water mixture over the sifted dry ingredients and use chopsticks or a wooden spoon to mix together until it turns into a shaggy dough.
- Use your hands to combine the shaggy dough and turn it into a ball of dough; It’s okay if there are some lumps in the texture. Transfer the dough onto a clean surface and try to knead for about three to five minutes to combine any loose parts of dough. Don’t worry if your dough is still lumpy at the end because you will finish kneading it later. The dough should not be sticky, but if you need extra flour sprinkle in a little while kneading.
- Place the dough into a one gallon resealable bag (if you are doubling this recipe, you need to use a large five gallon bag). Press out all the air and leave it to rest for 30 minutes on the counter.
- After resting, place a dish towel on the floor, put the dough bag on the towel, and place another dish towel on top.
- Carefully, step on the dough to flatten it until it turns into an even disk. This should take about 30 steps to turn from a ball into a flat disk. Remove the disk and fold it back into a ball and transfer it to the plastic bag. Repeat the foot kneading two more times for a total of about 90 steps. Test for doneness by slightly pinching the dough with your thumb and pointer finger, but don’t break it off. The end result should give you very smooth and soft dough that has a similar softness as an earlobe. After your third time foot stomping, fold into a ball again, transfer back into the bag and rest on the counter for two hours.
- Rolling option 1 – Pasta machine: Transfer the dough onto a clean surface and use your hands to flatten it into a small oval so that it can go through the pasta machine on the lowest setting, mine is setting 0. Pass the dough through the lowest setting at least two or three times or until it becomes smooth. Continue to move up until setting 2 or about 3.5 or 4 millimeters in thickness.
- Rolling option 2 – Rolling pin: Use your rolling pin to flatten out the dough in a rectangle until it reaches 3.5 or 4 millimeters in thickness.
- Cutting: Sprinkle some cornstarch on both sides of the dough and fold about ¼ of one side towards the middle. Continue this fold until you reach the other end. Position your folded dough so that it sits horizontally on the surface. Use a very sharp knife to cut vertical slices that are 3 millimeters in thickness in width. Remember that the udon noodles will get slightly larger while boiling (about 20-30% bigger) so you don’t want to cut pieces that are too thick. Sprinkle more cornstarch over the cut noodles and use your fingers to detangle them. Cook them immediately or freeze them in nests in an airtight bag.
Cooking udon noodles
- Add water in a large pot and bring to a boil. Add salt and swirl until it dissolves. Add about half of the noodles into the water and swirl them around to prevent them from sticking. Continue to boil the noodles for about 12-15 minutes for fresh noodles (or 20-25 minutes if frozen) or until they are soft throughout with a slight chewy texture.
- Remove the noodles when they’re done and straight into an ice bath for about one minute to stop the cooking.
- Add the noodles into a soup or stir fry them in a yaki udon recipe, and enjoy!


